
One day this past winter I was driving to work when I saw what looked like a dresser but actually was 3 old individual cabinets sitting curb side, unwanted. I arranged pick up before someone else could steal them from me. (Hee hee hee….seriously though!)
They came home with me and sat in my garage for most of the winter because I didn’t want to freeze while I sanded them down, plus I needed to find some inspiration for them. 😀
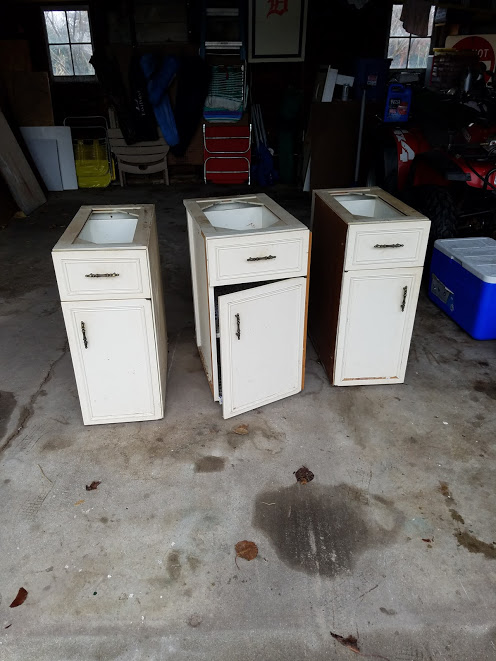
Aren’t they pretty?! LOL I did like the little molding on the doors and felt it gave it some charm.
Off to Pinterst, magazines, etc.
I scanned Pinterest for hours, looking to see what I could turn these beauts into and I came across this in a magazine I was browsing through. KITCHEN ISLAND! PERFECT! 😀
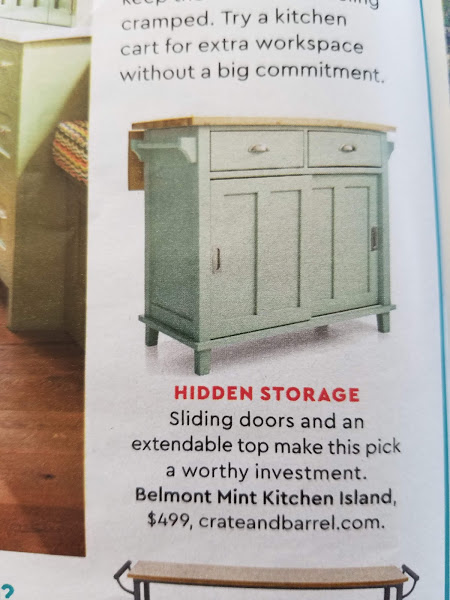
SO this became my inspiration but I wanted to make it more country since I would like to eventually redecorate my kitchen with a rooster/chicken flare to it. 😀 I knew I could make it for WAY less than $499 with a wooden cutting board top.
Off to the races….
So I had to pick up some chalk paint – of course chalk paint, right?! Hello? Nothing says rustic country chic like chalk paint.
Then it was the slow task of taking the doors off, taking all the hardware off (putting them into ziplock baggies), washing the doors down, then sanding some of the glossy paint; so when I painted, the new paint would stick.
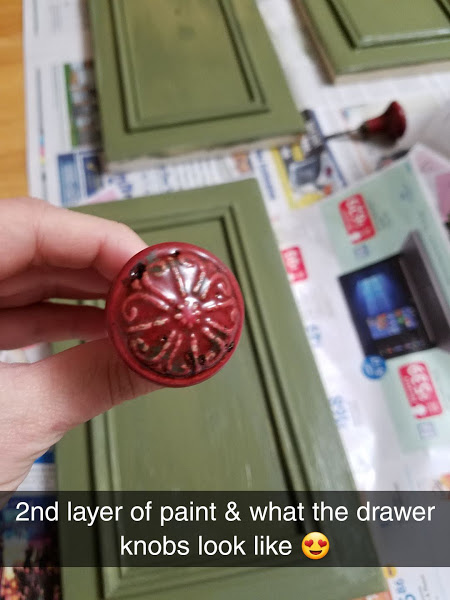
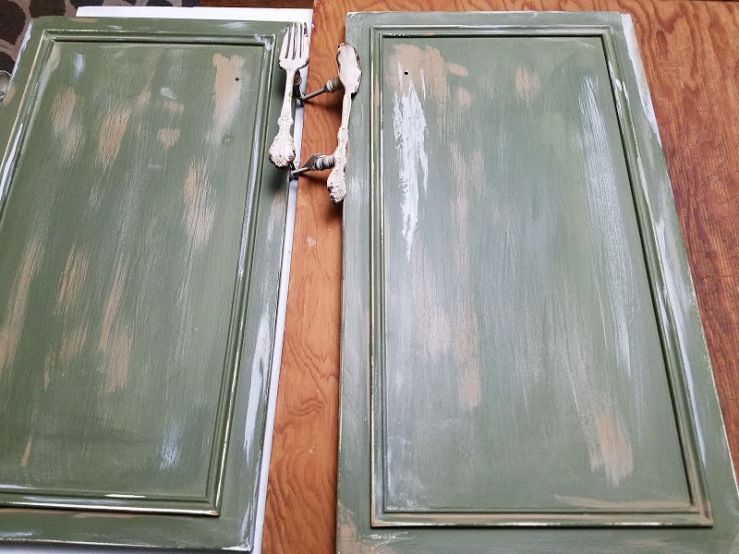
I picked out a DecoArt – American Deco -Chalky Finish in enchanted green. I thought the shade of green would go nicely with red, which I knew I would use as an accent color on the island (you know, for roosters and chickens). 🙂

My red accents I picked up at Hobby Lobby! (Oh how I HEART Hobby Lobby!) I got 3 knobs – one for each drawer.
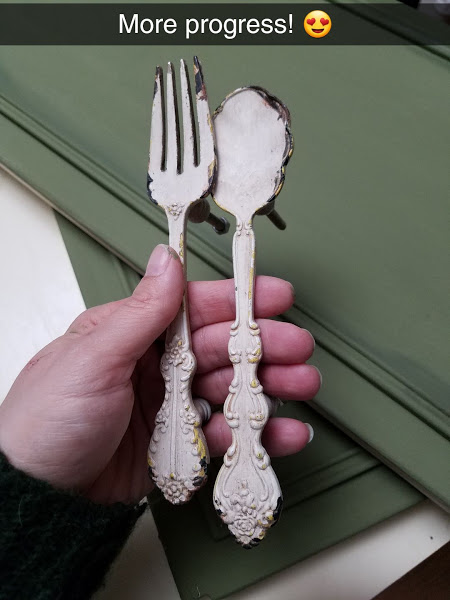
I picked up these adorbs rustic chic handles from a nearby store (supporting family small business in my little town)! Can’t have enough forks and spoons in a kitchen, right? 😉
One of a kind
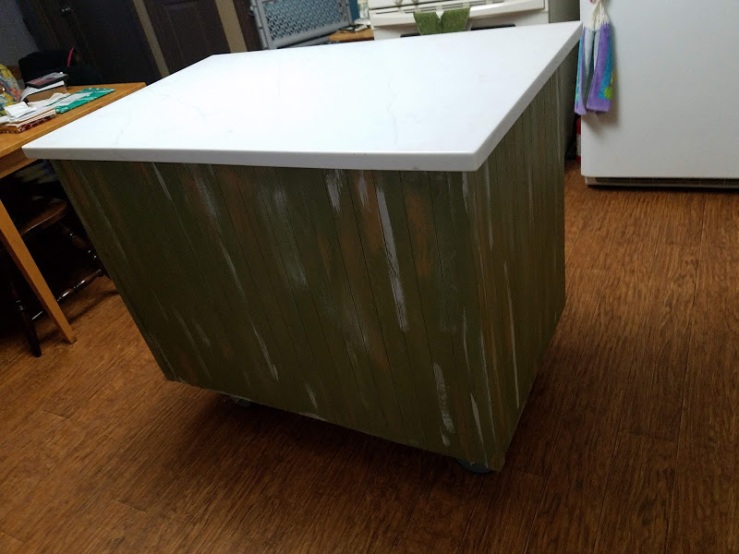
I wanted to distress the green and “antique” some so I randomly painted tan chalk paint and grey chalk paint. Then I attacked it with my hand sander.
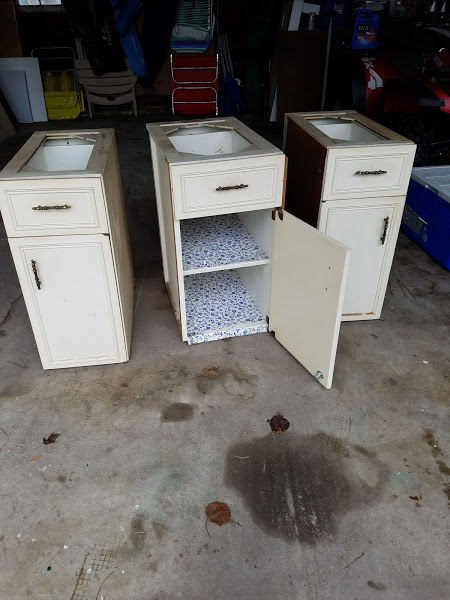
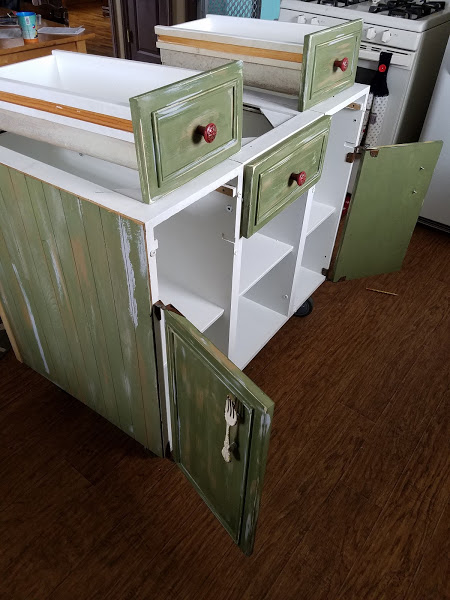
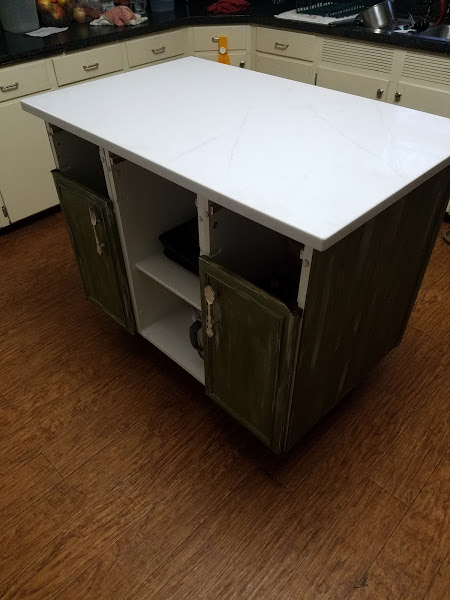
I asked my other half to attach the 3 individual cabinets together. Then I washed the inside down, took out the old contact paper (EWW!!!), painting the inside a semi gloss white.
These cabinets were rounded inside <— HUH!???????
I know, right? Hold old are these and when were cabinets rounded in the back?!? So I didn’t like that look on the backside so had my other half get some panel board.
Painted the panel board the green chalk, distressed it with tan and grey chalk paint. My other half cut the panel board to the correct size attached it to the cabinets (3 sides).
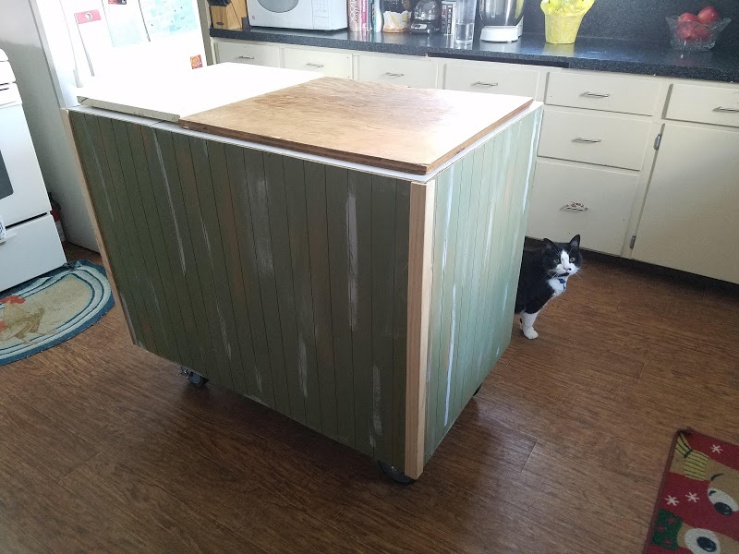
Then we added trim to the edges to cover the rough edges from cutting the panel board. I think it added I little detail to the piece. 😀 (On top, we put 2 cutting board so we could use the surface and keep things from falling into the drawers.)
My other half used the original hardware to put the drawer faces on and the cabinet doors on. He also put on the new handle and knobs on. (This shot you can see the fresh white insides!)
It’s slowly coming together! (Note: it’s March/April now in the pictures.)
Also we but heavy duty coaster wheeler on it so I can move it if needed and 2 of the wheels can lock so when I’m at the island, it won’t roll away on me. HEE HEE HEE
Decisions, decisions…
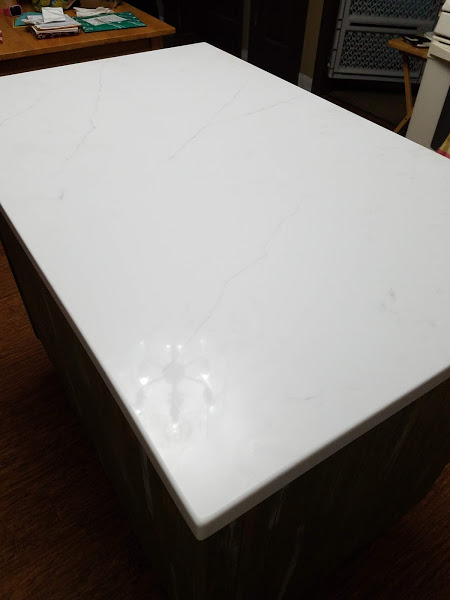
What did I want on the top? I could go butcher’s block style – cutting board as in my inspirational picture. I was currently well under the $499 price! WELL UNDER! And the butcher’s bock style top would keep me well under still.
I started to think long term. If I ever redid my kitchen cabinets and countertops, would I be happy with the butcher’s block style top kitchen island?
Not so much. ![]()
I started to price out quartz and decided I wanted to go with all most all white or all white quartz. Not only was it cheaper that route, but the all white top wouldn’t be too much for the detail in the bottom part of the island and I think it helped balance out the color of the piece.
So with the quartz, it did put me a little over what I wanted to spend BUT I LOVE THE quartz and am VERY happy I went that route.
My kids tease me that I have started cooking more, prepping all because of the island. LOL
I love that I can cook on the stove, turn around to face the island, do what I need there and then get back to cooking.
I love I have all my baking items in there, my blinder, measuring cups, cookie sheets, etc all in one spot.
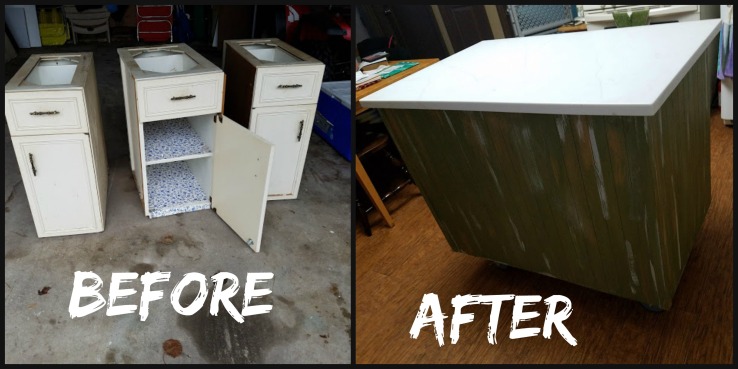
Can you believe how far these curb side cabinets came? They are now a cornerstone of the kitchen. ❤
Onto the next project!


 (Shirt & earrings $3.24, brown sweater – free, blue pants – free, brown swede shoes – $5)
